
Imagine biting into a warm, golden, sugar-dusted puff: crisp on the outside, with a light, hollow center just waiting for a drizzle of honey. These delightful pastries, known as Nun’s Puffs, have enchanted bakers for generations. With just a handful of everyday pantry staples, this Nun’s Puffs Recipe transforms simple ingredients into irresistible treats with minimal effort and maximum payoff. Whether you’re looking for a unique breakfast, an elegant addition to brunch, or a sweet midday snack, this classic recipe deserves a spot in your baking repertoire.

In this ultimate guide to making Nun’s Puffs, I’ll walk you through step-by-step instructions, roll out helpful pro tips, ingredient swaps, and clever storage ideas, ensuring your puffs turn out perfect every time. If you’re searching for a simple, crowd-pleasing bake, keep reading—you’re about to master the art of the Nun’s Puffs Recipe!
Table of Contents
Why You’ll Love Nun’s Puffs Recipe
- Effortless Elegance: Impressive results with minimal ingredients and steps.
- Versatile Snack: Perfect for breakfast, brunch, or teatime.
- Light and Airy Texture: Crisp exterior with a beautifully soft, hollow center.
- Customizable Sweetness: Adjust sugar and toppings to suit any palate.
- Family Favorite: Loved by kids and adults alike for their unique taste and fun presentation.
Ingredients for Nun’s Puffs Recipe
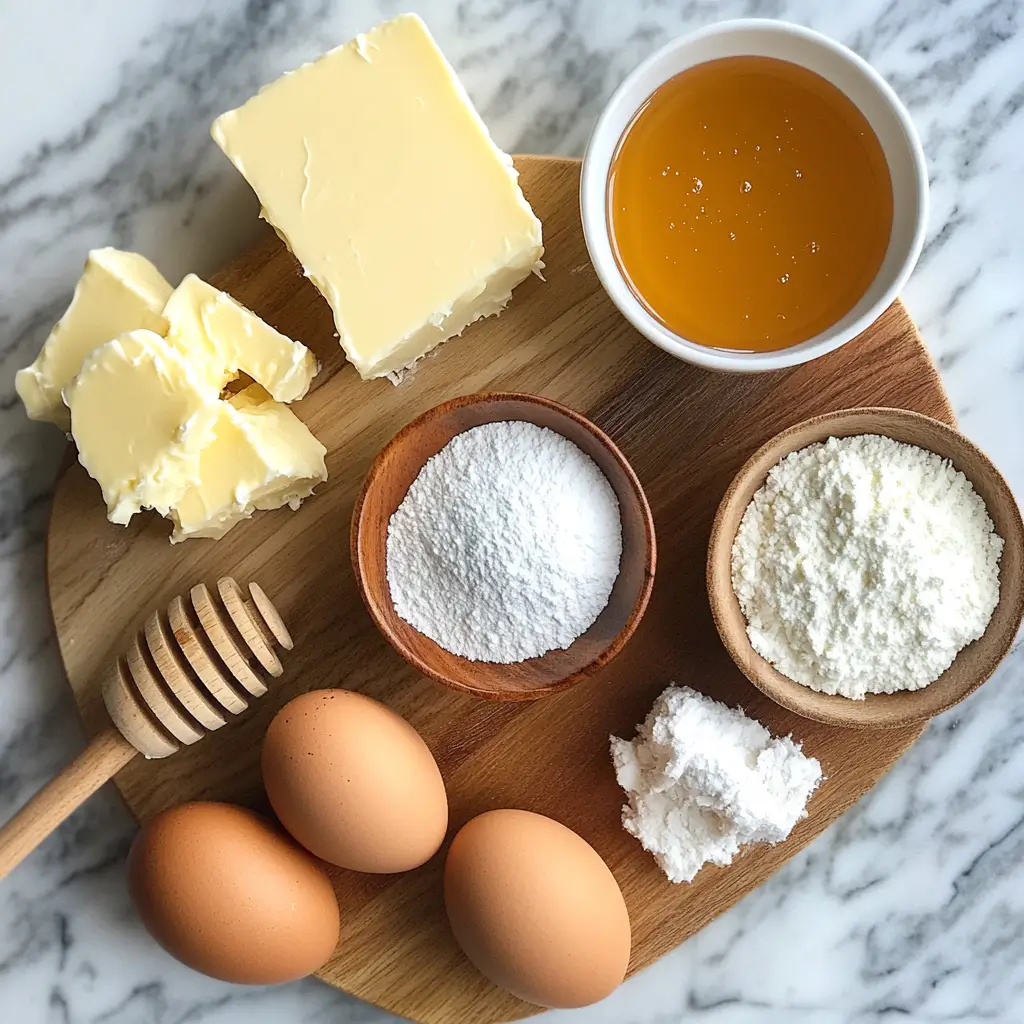
Let’s dive into what you’ll need for this classic Nun’s Puffs Recipe. These ingredients keep things simple while delivering delicate, deeply satisfying flavor and texture:
- Unsalted Butter (½ cup, 1 stick)
- Acts as the base for flavor and creates a tender pastry structure. Always use unsalted for better control of sweetness and overall taste.
- Milk (1 cup)
- Whole milk is preferable for richness, but low-fat varieties work in a pinch.
- All-Purpose Flour (¾ cup)
- Provides the structure; be sure to measure carefully for perfect puffs.
- Large Eggs (4)
- These create the signature puffy, airy texture and ensure the dough emulsifies properly.
- Granulated Sugar (½ to 1 tablespoon, optional)
- Gives a touch of sweetness within the dough; adjust to your liking or omit for a plainer puff.
- Additional Sugar (for sprinkling on top)
- Adds a pretty, slightly caramelized finish as the puffs bake.
- Honey (optional, for drizzling)
- For those who desire an extra hint of natural sweetness before serving.
Bonus tip: All of these are pantry staples—you might already have everything on hand!
Necessary Tools
Baking doesn’t require fancy gadgets for success—just a few reliable, quality basics. Here’s what you’ll want for this Nun’s Puffs Recipe:
- 12-cup Muffin Tin
- The right size for perfectly portioned, evenly baked puffs.
- Medium Saucepan
- For melting butter, heating milk, and mixing dough.
- Wooden Spoon or Sturdy Silicone Spatula
- Essential for vigorous mixing, especially once the dough forms a ball.
- Measuring Cups and Spoons
- Accurate flour and liquid measurements are key for puff success.
- Whisk or Hand Mixer (optional)
- Helpful for beating in the eggs if mixing by hand feels strenuous.
- Wire Cooling Rack
- Allows baked puffs to cool without steaming and becoming soggy.
- Small Spoon or Cookie Scoop
- Ensures uniform dough distribution in the muffin tin.
- Pastry Brush
- Useful for greasing tins thoroughly—key to preventing sticking!
Having these essentials on hand will streamline the process and practically guarantee fantastic results.
Ingredient Additions & Substitutions
The beauty of the Nun’s Puffs Recipe is its adaptability. Here are ideas for tweaking the ingredients, catering to personal taste preferences, dietary needs, or simply what’s available in your kitchen:
Butter
- For a slightly different flavor, try using European-style or cultured butter, which lends a rich, tangy note.
- Subbing with margarine or plant-based butter works for a dairy-free version, but look for sticks rather than tubs for best results.
Milk
- Prefer lactose-free? Any lactose-free whole or skim milk is fine.
- Plant-based milks like almond, oat, or soy may be used, but they may alter the flavor and result in slightly less richness. Opt for unsweetened, unflavored varieties to keep the puffs classic.
- For a more decadent result, swap in half-and-half for part or all of the milk.
Flour
- A gluten-free all-purpose flour blend can replace traditional flour if someone is celiac or gluten-sensitive. Stick with cup-for-cup blends for the best structure.
- Spelt or white whole wheat flour will yield a nuttier, earthier puff, though the crumb may be denser.
Eggs
- Large eggs are standard, but 4 extra-large eggs may make batter too runny. For medium eggs, use 5 eggs.
- Egg replacements (like commercial egg replacer or aquafaba) will not provide the same structure—the signature puffiness comes from real eggs.
Sugar
- Add up to 2 tablespoons of raw sugar or coconut sugar for a hint of caramel.
- Want a savory twist? Omit the sugar, and sprinkle with grated cheese, poppy seeds, or herbs before baking.
Toppings
- Instead of sprinkling plain sugar, try cinnamon sugar for a classic breakfast treat.
- Drizzle with maple syrup or fruit preserves in addition to (or instead of) honey for an extra wow-factor.
- Fresh berries, lemon zest, or a dollop of sweetened whipped cream make beautiful accompaniments.
The Nun’s Puffs Recipe is as charmingly simple—or as fancy—as you like. Feel free to play around until you discover your signature version!
How to Make Nun’s Puffs Recipe
This Nun’s Puffs Recipe is as easy as it is rewarding. The method is reminiscent of making choux pastry—heat, stir, mix, and bake. Whether you’re a baking novice or a seasoned home chef, these steps will guide you to fluffy, picture-perfect puffs.
Step 1: Prepare the Muffin Tin
- Preheat your oven to 375°F (190°C). The right temperature ensures the puffs rise and set beautifully.
- Generously grease a standard 12-cup muffin tin. Make sure you coat the bottoms, sides, and rims of each cup to prevent stubborn sticking—it’s crucial for that signature puff release.
Step 2: Prepare the Dough
- In a medium saucepan over medium heat, melt the butter completely.
- Pour the milk into the melted butter and bring the mixture to a gentle boil. Stir occasionally to blend and prevent scorching.
- Once boiling, add all the flour at once. Then, using a sturdy wooden spoon, stir vigorously and quickly until the mixture forms a soft, cohesive dough ball that pulls away from the sides. This step is essential for helping the puffs rise later.
- Take the saucepan off the heat, then allow the dough to cool for about 5 minutes—this prevents the eggs from scrambling in the next step.
Step 3: Incorporate the Eggs
- After a short cool-down, add the eggs one at a time.
- Beat well after each addition. At first, the dough may appear separated or slippery. Just keep mixing vigorously—it will gradually turn into a smooth, thick, glossy batter with the consistency of a stiff muffin mix.
- If adding sugar to the dough, mix it in with the first egg.
Step 4: Assemble the Puffs
- Divide the dough evenly among the 12 prepared muffin cups, filling each about two-thirds full. For evenly sized puffs, use a spoon or small cookie scoop.
- Sprinkle a pinch of granulated sugar on top of each portion. This encourages caramelization and a subtle crunch on top.
Step 5: Bake
- Place the tin in the preheated oven and bake for about 30 minutes.
- The puffs will rise, develop a dramatically craggy top, and turn a deep golden brown. Avoid opening the oven early—the puffs need steady heat to set correctly.
Step 6: Serve
- Remove the muffin tin from the oven. Promptly transfer each puff to a wire rack to cool just slightly.
- Serve warm, drizzled with honey, or simply as they are. Enjoy every bite of this wonderfully airy treat!
Serving Suggestions
Nun’s Puffs are delightfully versatile and can be served in various delicious ways. Here are some ideas to serve up your freshly baked puffs:
- Classic: Enjoy warm with a dusting of powdered sugar or a drizzle of honey—simple and elegant.
- Breakfast or Brunch: Accompany with fresh fruit, yogurt, and a cup of coffee or tea.
- Dessert: Split puffs and fill with sweetened whipped cream, mascarpone, or pastry cream, then top with berries or chocolate sauce.
- Savory Twist: Omit sugar and instead serve with a fluffy scrambled egg or smoked salmon and dill for a sophisticated brunch.
- Holiday Flair: Serve them alongside holiday brunch spreads—they pair beautifully with fruit salads, baked ham, and mimosas.
No matter the occasion, this Nun’s Puffs Recipe is guaranteed to impress!
Pro Tips & Tricks
Baking Nun’s Puffs looks simple (and it is), but a few professional hacks guarantee perfect results every time:
- Grease Well: Coat the muffin tin generously, including the rims, to prevent sticking and achieve easy release.
- Don’t Rush the Cooling: Letting the dough rest for a few minutes after boiling keeps the eggs from scrambling and ensures a smooth batter.
- Beat Vigorously: Mix the eggs in well. It’ll look streaky at first, but perseverance leads to the characteristic smooth, glossy batter.
- Don’t Overfill: Stick to filling muffin cups two-thirds full; otherwise, the puffs may expand over the edges and stick.
- Avoid Peeking: The oven door must stay shut during baking—opening early risks collapsing your puffs.
- Serve Fresh: Enjoy Nun’s Puffs within hours of baking when they’re crispest. They can get soft as they sit.
Want even more impact? Try baking a small test puff before committing the whole tin—a fun way to tweak sugar or ingredient levels to your taste.
How to Store Nun’s Puffs
Nun’s Puffs are best enjoyed fresh and warm, but you can store leftovers with a little care:
- Room Temperature: Line a container with a paper towel and add cooled puffs. Cover loosely and consume within 24 hours for best texture.
- Refrigerator: While they’ll soften, you can refrigerate in an airtight container for up to 2 days. To refresh, reheat in a 350°F oven for 5-8 minutes—the outside will crisp up again.
- Freezer: Puffs freeze surprisingly well. Cool completely, then freeze in a ziplock bag for up to 2 months. Thaw at room temperature, then briefly reheat before serving.
Avoid covering tightly while still warm—this traps steam and makes the pastries soggy. Always allow to cool to room temperature first!
General Information
Nun’s Puffs, sometimes known by their French name Pets de Nonne, are whimsical pastries with a storied past. Their origins are debated, but they’re reputed to have been created by nuns in French convents, using simple, affordable ingredients. Their light, airy nature makes them a cross between a popover and a cream puff, though they remain delightfully unique.
The signature hollow interior is thanks to the steam created by high moisture batter in a hot oven—like classic choux pastry but far simpler to assemble at home. They’ve become a beloved treat across Europe and North America, particularly for breakfast or brunch occasions.
Whether you know them as Nun’s Puffs, French Puffs, or their more mischievous Pets de Nonne moniker, their charm endures. And now, you can carry on the tradition in your own kitchen with this reliable Nun’s Puffs Recipe!
FAQs
What is the common problem in making cream puffs?
The most common problem is deflation after baking. This happens when the oven door is opened too early, the oven temperature is too low, or the puffs are underbaked. To prevent this, bake at a consistent 375°F, avoid opening the oven door during baking, and ensure puffs are deep golden brown before removing them.
What is the filling in cream puffs?
Traditional cream puffs are filled with pastry cream, whipped cream, or custard. Popular variations include vanilla pastry cream, chocolate cream, or sweetened whipped cream with vanilla extract. For Nun’s Puffs, you can split them and fill with any of these options, though they’re often enjoyed plain with just a drizzle of honey.
What are the ingredients of puffs?
Basic puff ingredients include butter, milk (or water), all-purpose flour, and eggs. For Nun’s Puffs specifically, you need ½ cup unsalted butter, 1 cup milk, ¾ cup all-purpose flour, 4 large eggs, and optional sugar for sweetness. These simple pantry staples create the signature light, airy texture.
Should you refrigerate cream puffs?
Yes, filled cream puffs should be refrigerated and consumed within 2 days. However, unfilled Nun’s Puffs can stay at room temperature for up to 24 hours in a loosely covered container. For best texture, store them at room temperature and fill just before serving, or reheat refrigerated puffs in a 350°F oven for 5-8 minutes to restore crispness.
What ethnicity are cream puffs?
Cream puffs originated in France, where they’re called “choux à la crème.” The technique of making choux pastry dates back to the 16th century French court. Nun’s Puffs (Pets de Nonne) also have French origins, traditionally made in French convents using simple, affordable ingredients available to religious communities.
What do the British call cream puffs?
In Britain, cream puffs are typically called “profiteroles” when served as individual pastries, especially when filled with cream and topped with chocolate sauce. The term “choux buns” is also used. Fresh berries and cream are popular accompaniments in British preparations.
What’s the difference between a cream puff and an eclair?
The main difference is shape and presentation. Cream puffs are round and typically filled through the bottom or split in half, while eclairs are elongated (oblong) and usually filled through small holes, then topped with icing or chocolate glaze. Both use the same choux pastry base, but eclairs are piped into finger-like shapes before baking.
Conclusion
This Nun’s Puffs Recipe showcases the magic of baking: with just a few simple ingredients and straightforward steps, you’ll have a golden, airy treat that delights every palate. Whether you’re baking for family, friends, or just yourself, these timeless puffs are sure to become a go-to favorite. Ready your muffin tin—it’s time to discover why this classic pastry has stood the test of time!
Nutritional Information
These figures are approximate and based on a standard 12-puff batch with honey drizzle:
- Calories: 120-130 per puff (without honey)
- Fat: 7g
- Carbohydrates: 11g
- Sugar: 2g (varies with added sugar/honey)
- Protein: 3g
- Cholesterol: 60mg
- Sodium: 35mg
Nun’s Puffs provide a light, lower-calorie option compared to heavier pastries or doughnuts. They contain no leavening agents and only a modest amount of sugar, especially if you skip the honey. Add toppings mindfully if you’re monitoring your intake. For a gluten-free or dairy-free version, substitute flour and butter as described above. Enjoy these classic pastries as an occasional treat—light, fluffy, and made to be shared!
Print
Nun’s Puffs Recipe
- Total Time: 45 minutes
- Yield: 12 1x
Description
Nun’s Puffs are a classic pastry, a delightful fusion of simple ingredients that transform into a light, airy delicacy. With a buttery base, enriched with milk and eggs, these puffs boast a crisp exterior and a tender, fluffy interior. They are lightly sweetened, with the option to add granulated sugar and a honey drizzle for extra flavor. Perfect for breakfast or a sweet snack, they are easy to prepare and bake to golden perfection.
Ingredients
- ½ cup (1 stick) unsalted butter
- 1 cup milk
- ¾ cup all-purpose flour
- 4 large eggs
- ½ to 1 tablespoon granulated sugar (optional)
- Additional sugar for sprinkling on top
- Honey for drizzling (optional)
Instructions
- Preheat your oven to 375°F (190°C).
- Generously grease a 12-cup muffin tin, coating all sides to prevent sticking.
- In a medium saucepan over medium heat, melt the butter.
- Add the milk to the melted butter and bring to a gentle boil.
- Once boiling, add flour, stirring vigorously until it forms a cohesive ball.
- Remove from heat and let the dough cool for about 5 minutes.
- Add the eggs one at a time, beating well after each addition until smooth.
- Divide dough among the muffin cups, filling each about two-thirds full.
- Sprinkle sugar on top of each puff.
- Bake in preheated oven for approximately 30 minutes until golden brown.
- Remove puffs from oven and transfer from tin to wire rack to cool slightly.
Notes
For a healthier alternative, use whole wheat flour instead of all-purpose. To make ahead, prepare the dough and store it in the fridge for up to a day; bake when ready to serve. If puffs collapse, ensure the oven temperature is correct and avoid opening the door while baking. These can be stored in an airtight container for 1-2 days but are best fresh. Customize sweetness by adjusting sugar levels or omitting honey.
- Prep Time: 15 minutes
- Cook Time: 30 minutes
- Category: Dessert
- Method: Baking
- Cuisine: French
Nutrition
- Serving Size: 1 puff
- Calories: 110
- Sugar: 2g
- Sodium: 70mg
- Fat: 8g
- Saturated Fat: 5g
- Unsaturated Fat: 3g
- Trans Fat: 0g
- Carbohydrates: 8g
- Fiber: 0g
- Protein: 3g
- Cholesterol: 60mg